Integrating Sendinblue with your Next.js blog allows you to build an email newsletter that keeps readers updated on your latest articles and business developments. This guide walks through creating and sending newsletters to a large audience.
Introduction to Sendinblue
Sendinblue is a comprehensive marketing platform offering tools for customer engagement and business growth, including email marketing, SMS, chat, CRM, and automation. With Sendinblue, you can create and send email campaigns, automate your email marketing, segment your contacts, and track the performance of your campaigns. The platform also offers a drag-and-drop editor to design professional-looking emails, and a variety of templates to choose from. Additionally, it provides robust APIs for seamless integration with platforms like Next.js, websites, or custom software.
Create Sendinblue Account
The first step in building an email newsletter with Next.js is to set up a Sendinblue account if you don’t already have one. Once you have an account, you can create a new campaign and design your newsletter template.
Creating a Sendinblue account is a simple process. Here are the steps to follow:
- Go to the Sendinblue website
- Click on the Sign Up Free button on the top right corner of the page
- Fill in your personal information, such as your name, email address, and password. Or you can simply Sign Up with Google or Apple account.
- Verify your email address by clicking on the link sent to your email
- Once you have verified your email, you will be prompted to log in to your account.
- Once logged in, you’ll access your dashboard to start creating campaigns, designing templates, and managing contacts.
Creating the form
Now, let’s create a simple form to collect your readers’ email addresses.
Create a new component named NewsletterForm.tsx. You can build your own or use the following code as a starting point.
const NewsletterForm = () => { return ( <div className="mx-auto w-full max-w-xl rounded-sm border border-gray-700 bg-slate-900 p-5"> <p className="text-lg font-bold">Subscribe to the newsletter</p>
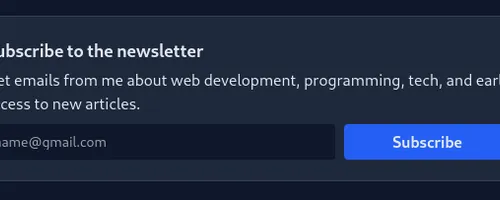
<p className="py-1"> Get emails from me about web development, programming, tech, and early access to new articles. </p> <form className="mx-auto mt-1 w-full" method="post" target="_blank"> <div className="flex w-full flex-wrap items-center justify-center gap-2"> <input type="email" id="email" className="block flex-auto rounded-sm p-2 text-sm text-slate-400 focus:border-blue-500 focus:ring-blue-500" placeholder="name@gmail.com" required /> <button type="submit" className="w-28 flex-1 rounded-sm bg-blueAccent p-1.5 text-center font-bold text-slate-200 transition-colors hover:bg-blue-500" > Subscribe </button> </div> </form> </div> );};
export default NewsletterForm;The newsletter form will look like this:
Creating the custom hook
We’ll create a custom hook to manage the form. Abstracting the logic into a hook promotes code organization and reusability. Here’s an example of how you might create a custom hook for handling the newsletter form.
import { useRef, useState } from "react";
export enum Form { Initial, Loading, Success, Error,}
export type FormState = { state: Form; message?: string;};
export function useNewsletter() { const [form, setForm] = useState<FormState>({ state: Form.Initial });}The hook imports useState and useRef from React. useState manages the form’s state, while useRef tracks the email input element.
import { useRef, useState } from "react";
export enum Form { Initial, Loading, Success, Error,}
export type FormState = { state: Form; message?: string;};
export function useNewsletter() { const [form, setForm] = useState<FormState>({ state: Form.Initial }); const inputEl = useRef<HTMLInputElement>(null);}It declares a form state variable initialized with { state: Form.Initial }. The state property tracks the form’s status (Initial, Loading, Success, or Error), and the optional message property displays status-specific feedback.
The hook defines an exported subscribe function to handle form submission. It accepts a React.FormEvent parameter representing the submission event.
Inside the function, the first thing it does is calling the preventDefault method on the event object to prevent the page from refreshing when the form is submitted. Then it changes the state of the form to Form.Loading
import { useRef, useState } from "react";
export enum Form { Initial, Loading, Success, Error,}
export type FormState = { state: Form; message?: string;};
export function useNewsletter() { const [form, setForm] = useState<FormState>({ state: Form.Initial }); const inputEl = useRef<HTMLInputElement>(null);
async function subscribe(e: React.FormEvent) { e.preventDefault(); setForm({ state: Form.Loading }); }}It then uses the Fetch API to send a POST request to /api/newsletter, including the email from the input field in the JSON body and setting the Content-Type header to application/json.
After the request completes, it parses the JSON response and checks for an error property. If present, it updates the form state to Form.Error and sets the message to the returned error.
import { useRef, useState } from "react";
export enum Form { Initial, Loading, Success, Error,}
export type FormState = { state: Form; message?: string;};
export function useNewsletter() { const [form, setForm] = useState<FormState>({ state: Form.Initial }); const inputEl = useRef<HTMLInputElement>(null);
async function subscribe(e: React.FormEvent) { e.preventDefault(); setForm({ state: Form.Loading });
const res = await fetch(`/api/newsletter`, { body: JSON.stringify({ email: inputEl.current!.value, }), headers: { "Content-Type": "application/json", }, method: "POST", });
const { error } = await res.json();
if (error) { setForm({ state: Form.Error, message: error, }); return; } }}On success, it clears the input field and updates the form state to Form.Success with the message ‘Success! You’ve been added to the list!’
import { useRef, useState } from "react";
export enum Form { Initial, Loading, Success, Error,}
export type FormState = { state: Form; message?: string;};
export function useNewsletter() { const [form, setForm] = useState<FormState>({ state: Form.Initial }); const inputEl = useRef<HTMLInputElement>(null);
async function subscribe(e: React.FormEvent) { e.preventDefault(); setForm({ state: Form.Loading });
const res = await fetch(`/api/newsletter`, { body: JSON.stringify({ email: inputEl.current!.value, }), headers: { "Content-Type": "application/json", }, method: "POST", });
const { error } = await res.json();
if (error) { setForm({ state: Form.Error, message: error, }); return; }
inputEl.current!.value = ""; setForm({ state: Form.Success, message: `Success! You've been added to the list!`, }); }}Finally, the hook returns an object with subscribe, inputEl, and form, providing the component with everything needed to render and manage the form.
import { useRef, useState } from "react";
export enum Form { Initial, Loading, Success, Error,}
export type FormState = { state: Form; message?: string;};
export function useNewsletter() { const [form, setForm] = useState<FormState>({ state: Form.Initial }); const inputEl = useRef<HTMLInputElement>(null);
async function subscribe(e: React.FormEvent) { e.preventDefault(); setForm({ state: Form.Loading });
const res = await fetch(`/api/newsletter`, { body: JSON.stringify({ email: inputEl.current!.value, }), headers: { "Content-Type": "application/json", }, method: "POST", });
const { error } = await res.json();
if (error) { setForm({ state: Form.Error, message: error, }); return; }
inputEl.current!.value = ""; setForm({ state: Form.Success, message: `Success! You've been added to the list!`, }); }
return { subscribe, inputEl, form };}Save Sendinblue API key
To make Sendinblue API requests, include the API key in the request headers. To obtain your Sendinblue API key, sign in and follow these steps:
- Click on the “Settings” icon in the top right corner of the page.
- In the settings menu, click on the “SMTP & API” tab.
- In the SMTP & API page, you will find your API key under the “API v3” section.
- Click on the “Create a v3 API key” button to generate a new key if you don’t have any yet.
- You should copy the key and keep it in a safe place, you will use it in your application when you make requests to the Sendinblue API.
Keep your API key secure—never share it or commit it to your codebase. Always store sensitive information like API keys in environment variables instead of hardcoding them.
Create .env file in root folder of your project. In the .env file, add a new variable called SENDINBLUE_API_KEY and set it to your Sendinblue API key. For example:
SENDINBLUE_API_KEY=your_api_key_hereCreating the API route
To handle the form submission from the useNewsletter hook, you will need to create an API route in your Next.js application that will handle the POST request made by the hook. Here’s an example of how you might create such an API route:
- Open or create api folder inside pages directory
- Inside the api folder, create a new file called newsletter.ts
- In newsletter.ts, you’ll use Next.js API routes to define the endpoint that will handle the newsletter subscription. Here’s an example of what the code might look like:
import { NextApiRequest, NextApiResponse } from "next";
export default async function handler( req: NextApiRequest, res: NextApiResponse,) { const { email } = req.body;
if (!email) { return res.status(400).json({ error: "Email is required" }); }
const result = await fetch("https://api.sendinblue.com/v3/contacts", { method: "POST", headers: { accept: "application/json", "Content-Type": "application/json", "api-key": process.env.SENDINBLUE_API_KEY!, }, body: JSON.stringify({ updateEnabled: false, email: email, listIds: [5] }), });
const data = await result.json();
if (!result.ok) { return res.status(500).json({ error: data.error.email[0] }); }
return res.status(201).json({ error: "" });}- In the code above, the async
handlerfunction (exported as default) processes incoming POST requests. It first validates that the request body contains an email; if not, it returns a 400 Bad Request with the message ‘Email is required’. - Next, it sends a POST request to Sendinblue’s contact creation endpoint using the Fetch API, including headers like the API key, content type, and accept type. The request body includes the email address, an
updateEnabledflag, and the target list IDs. - After the request, it checks the response status. On failure, it returns a 500 Internal Server Error with the API’s error message. On success, it returns 201 Created with an empty error field.
Sending the data to Sendinblue
Let’s get back to NewsletterForm component and add the useNewsletter hooks to handle the form submission.
import { useNewsletter, Form } from "../utils/hooks/useNewsletter";
const NewsletterForm = () => { const { form, subscribe, inputEl } = useNewsletter();
return ( <div className="mx-auto w-full max-w-xl rounded-sm border border-gray-700 bg-slate-900 p-5"> <p className="text-lg font-bold">Subscribe to the newsletter</p>
<p className="py-1"> Get emails from me about web development, programming, tech, and early access to new articles. </p> <form onSubmit={subscribe} className="mx-auto mt-1 w-full" method="post" target="_blank" > <div className="flex w-full flex-wrap items-center justify-center gap-2"> <input type="email" ref={inputEl} id="email" className="block flex-auto rounded-sm border border-slate-700 bg-slate-700 p-2 text-sm text-slate-400 focus:border-blue-500 focus:ring-blue-500" placeholder="name@gmail.com" required /> <button type="submit" className="w-28 flex-1 rounded-sm bg-blue-600 p-1.5 text-center font-bold text-slate-200 transition-colors hover:bg-blue-500" > {form.state === Form.Loading ? ( <span>Loading...</span> ) : ( "Subscribe" )} </button> </div> {form.state === Form.Success ? ( <div className="mt-4"> <span className="font-bold text-green-600"> ✅ Thank you for subscribing to my newsletter! </span> </div> ) : ( <span></span> )} </form> </div> );};
export default NewsletterForm;Conclusion
Building an email newsletter with Sendinblue and Next.js is an excellent way to maintain user engagement and share updates about your business or projects. The setup involves creating a Sendinblue account, building a subscription form in Next.js, managing submissions with a custom hook, and implementing an API route to communicate with Sendinblue.
Next.js excels here due to its server-side rendering capabilities and built-in API routes, simplifying form handling and external API interactions.
Remember to secure API keys and personal data using environment variables. Also, implement proper error handling for API interactions and provide an unsubscribe mechanism.
In summary, integrating Sendinblue with Next.js empowers you to maintain meaningful connections with your audience through targeted newsletters.